 Video Delay
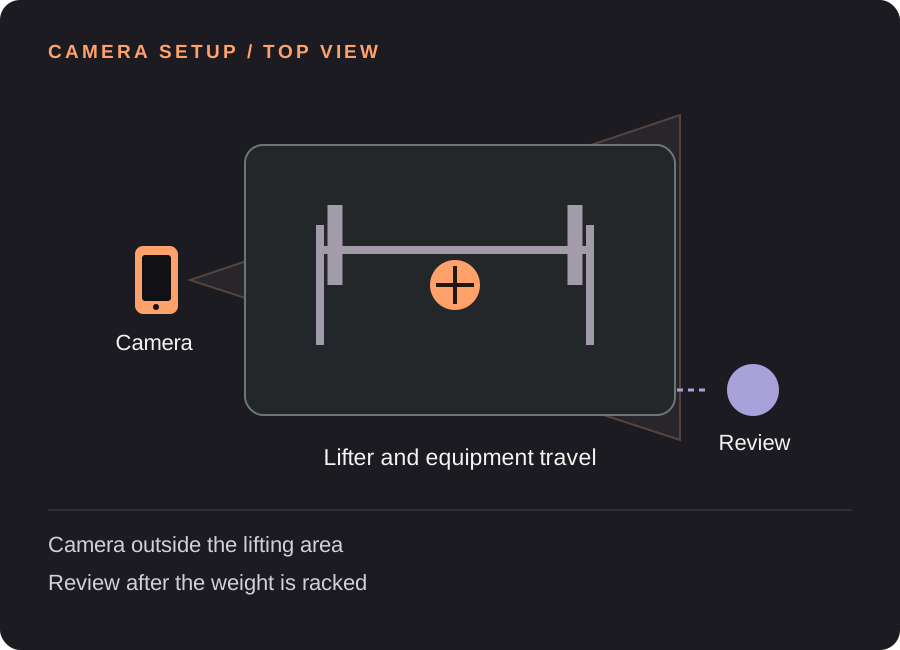
Set up your lifting replay station
Choose the view for the question
A side view and a front or rear view reveal different visible positions. Select the angle for the cue you are working on with your coach. Keep the view consistent across attempts; an off-center camera can change how lines and joint angles appear.
Frame the equipment as well as the athlete
Check the lowest and highest positions before loading the working set. Keep the relevant bar, plates, hands and feet inside the frame. Place the device where it will not interfere with the rack, moving equipment or people walking through the gym.
Include the time to rack and step away
Count from the start of the rep until the equipment is secure, then add your time to turn toward the screen. A 6-second attempt with a 4-second return and a 2-second margin suggests 12 seconds. Use a test rep to adjust.
Pick a clip length that fits
The longest saved rep is 30 seconds. For a long set, use the delayed view for immediate feedback or record the whole set with a normal camera. Do not assume a 60-second delay means the app saves 60-second clips.
Find your starting delay. Movement time + time to finish and look + a little margin. Open the free delay planner with this guide’s example. These are starting examples, not measured recommendations for every athlete or room.
A useful loop for the next few attempts
Keep one question for the set
For example, use a checkpoint already supplied by a coach. A video is an observation from one viewpoint, not a diagnosis of pain or a personalized prescription for a lifting technique.
Finish before looking
Let the rep end and secure the equipment before watching the delayed view. If you miss the start, increase the replay delay. Do not shorten your finish simply to catch the screen.
Review the saved rep slowly
Save after the relevant rep has played on the delayed screen. Step through the frames and use manual lines only as a visual reference. Keep the same camera placement for the next attempt.
Need the controls first? Walk through the app screens, or read how to save and review a rep.
When the setup does not quite work
| What you notice | What to change |
|---|---|
| The rack blocks the movement | Move the camera to a clear sight line before the next set. |
| The replay arrives before I finish racking | Add the racking and return time to the delay. |
| A long set will not fit the saved clip | Use a normal camera recording for the whole set; save a shorter selected passage in Video Delay. |
Lifting replay questions
Does it tell me whether my lift is correct?
No. It gives you video to review. It does not judge technique, diagnose an injury or calculate personalized training advice.
Can it measure a true joint angle?
Manual drawing angles are based on the two-dimensional picture. Camera position and perspective affect them; they are not calibrated biomechanical measurements.
Can it automatically count reps?
This workflow does not include an automatic rep counter. You choose which moments to watch and save.
Before the next session
This guide covers camera setup and review workflow. It is not a sport lesson or a claim that a specific setup improves performance. Clips, camera angles and manual drawings need your own interpretation.
Make the next rep easier to see.
Video Delay runs on iPhone and iPad with iOS or iPadOS 17 or later. Choose a 1–60 second delay, then save selected 5, 10, 15 or 30 second reps for slow motion, frame stepping and manual drawings. No automatic form score.
Get Video Delay on the App StoreOne-time paid download. Apple shows your local price before purchase. No subscription or in-app purchases. See the illustrated app walkthrough.